«Routers» tab
Tab displays list of all routers in the project:
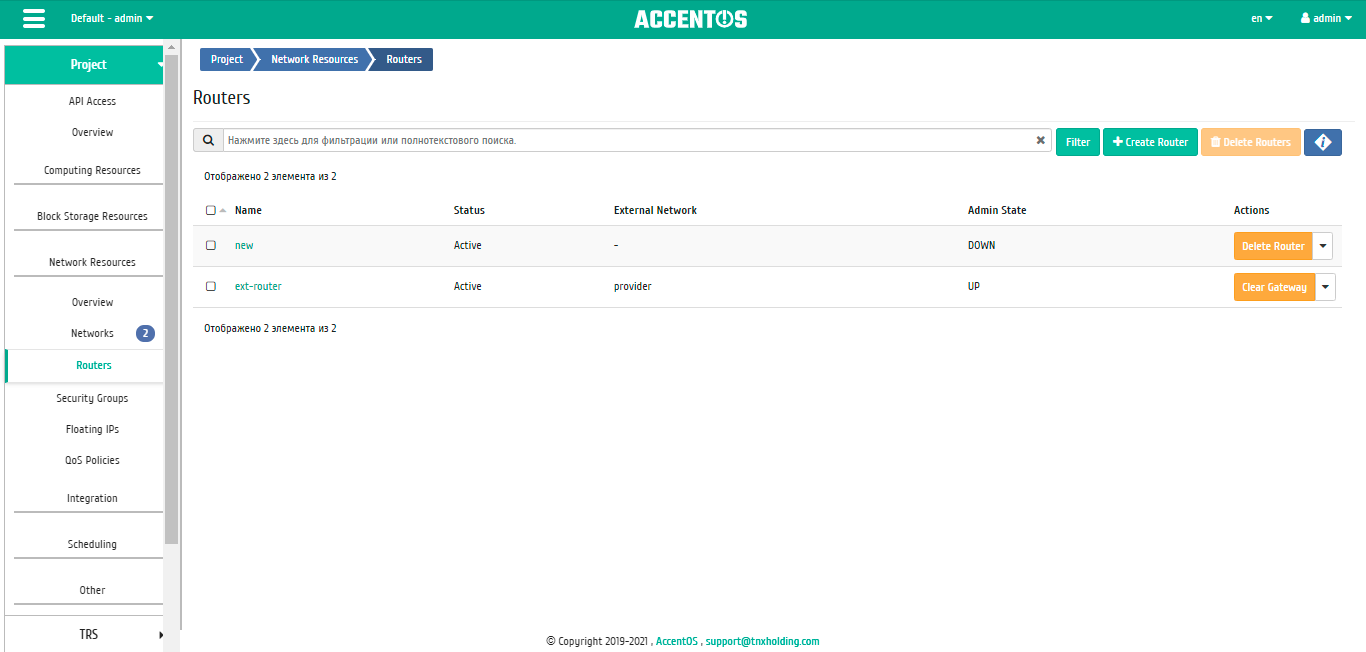
Routers list
| Field name | Description |
|---|---|
| Name | Name is set arbitrarily when creating new router by the user. |
| Status | State of router. |
| External Network | External Network. |
| Admin State | Admin state of router. Possible values are:
|
Sorting and filtering tools are available for the list of routers. Fields are sorted in ascending and descending order. It is also possible to sort objects marked with check mark. Filtration is performed according to following parameters:
- Router Name is name of router. Only exact input is allowed;
- Status is the state of router. Incomplete input is allowed;
- External network is external network. Incomplete input is allowed;
- Administrative State is administrative state of router. Incomplete input is allowed.
Also, the user can view detailed information about router. Detailed information about object opens in separate block on the right side of the page when you click on router name link. This does not close the list of objects and is displayed on the left side of the page. To close block of detailed information use the  button, to open a block of detailed information use the button
  .
.
Detailed information about the router is presented in three tabs.
«Overview» tab
Tab displays detailed information about specific router:
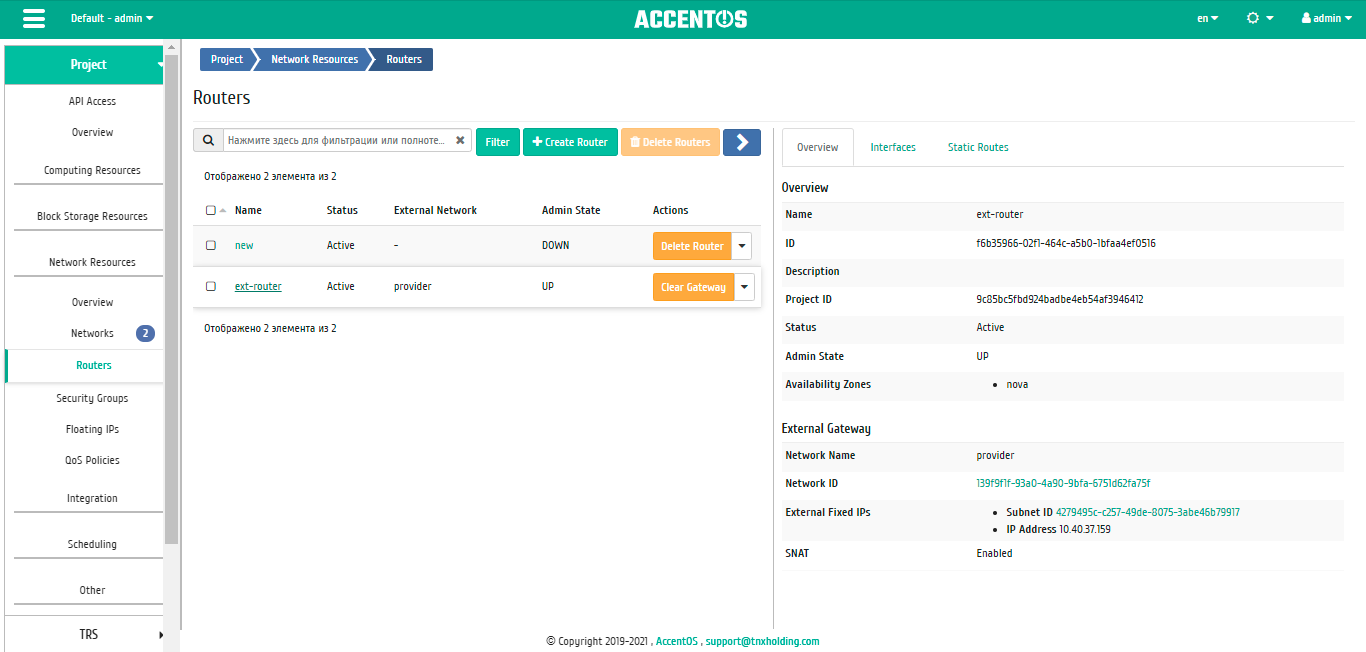
Router details
Note
Router’s network ID is link to details page for that network. This allows to jump to desired object directly, bypassing the process of searching and switching between tabs. When you open links in a new tab/window, in addition to going to network details, corresponding section of the main menu opens.
«Interfaces» tab
Tab displays list of connected ports, also allows to view detailed information about specific connection:
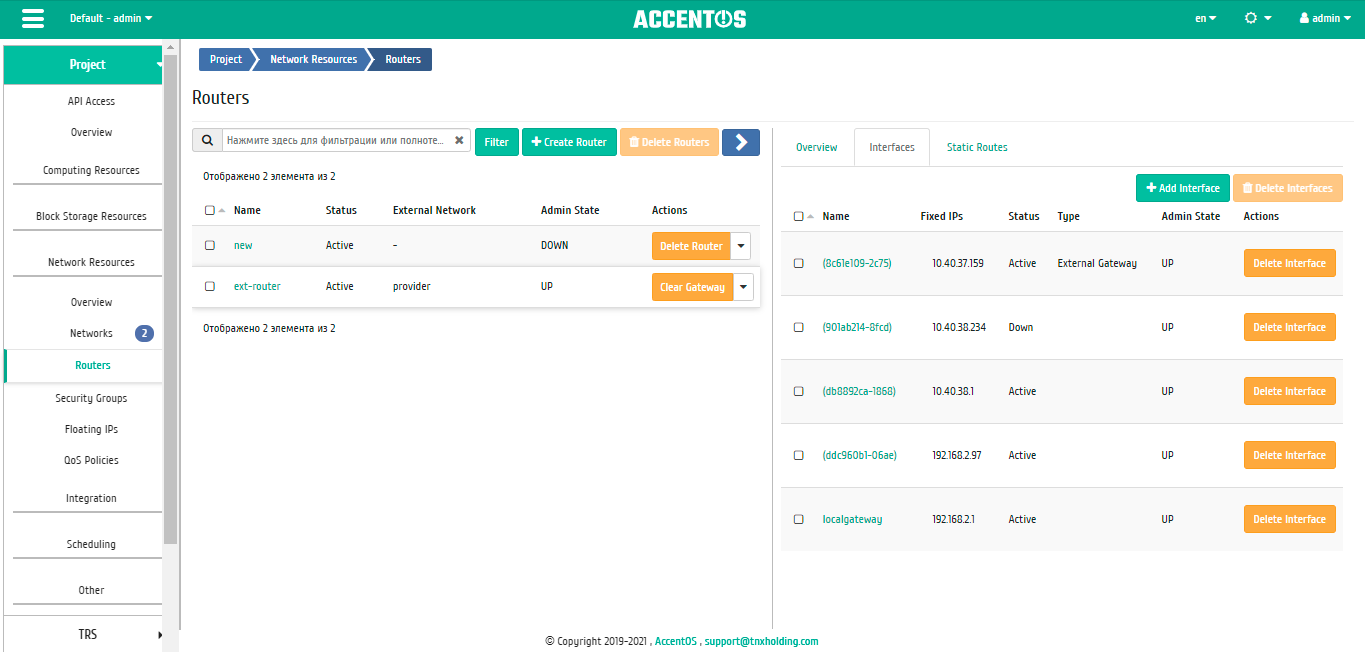
Interfaces list
| Field name | Description |
|---|---|
| Name | Interface name. Name is assigned automatically. Also it serves as link to jump to detailed information about specific port. |
| Fixed IPs | IP address associated with instance each time it connects. |
| Status | Interface state. |
| Type | Interface type. |
| Admin State | Admin state of router. Possible values are:
|
Sort tool is available for all displayed fields. Fields are sorted in ascending and descending order. It is also possible to sort objects marked with check mark.
| N | Action | Description |
|---|---|---|
| 1 | Add Interface | Adding interface. |
| 2 | Delete Interface | Deleting interface. |
«Static Routes» tab
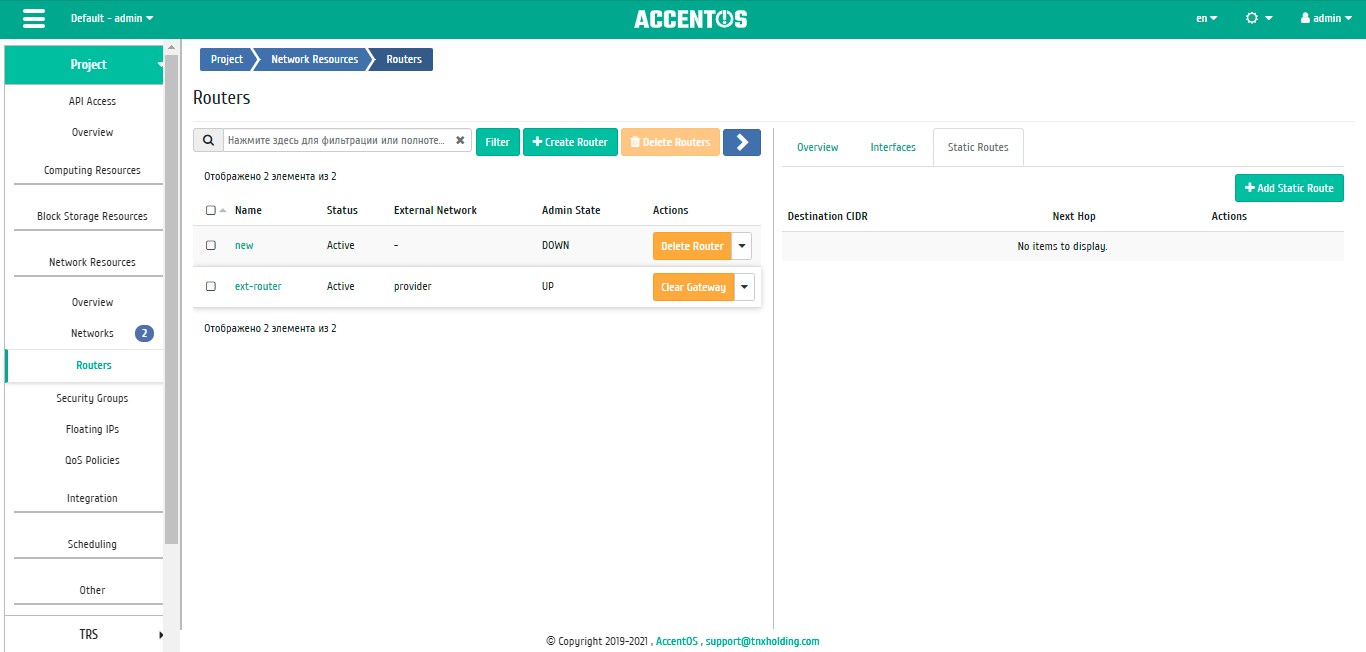
Static routes list
| Field name | Description |
|---|---|
| Destination CIDR | CIDR is displayed; |
| Next hop | Hop is displayed. |
Sort tool is available for all displayed fields. Fields are sorted in ascending and descending order.
| N | Action | Description |
|---|---|---|
| 1 | Add static route | Adding static route. |
| 2 | Delete static route | Deleting static route. |
| N | Action | Description |
|---|---|---|
| 1 | Create router | Adding router. |
| 2 | Edit router | Modifing existing router. |
| 3 | Clear gateway | Disabling router gateway. |
| 4 | Delete router | Deleting selected router. |
| 5 | Set gateway | Connecting external network to the router. Outside network is treated as the default gateway to the outside connection. |
Features of work
Adding router
In the general list of routers on the control panel using the “Create router” button, open wizard for creating router:
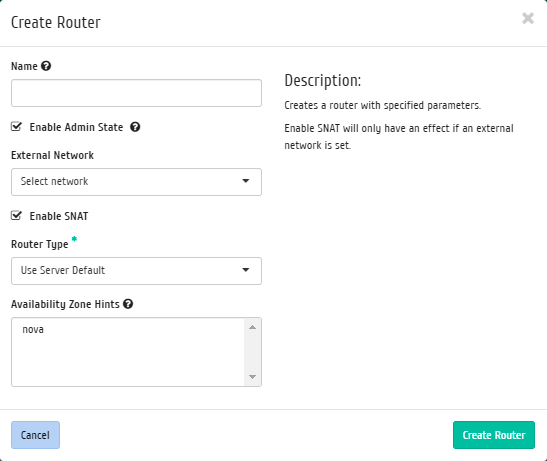
Router creation window
In the window that opens, indicate:
- Name is optional field; if the value is empty, the name is generated automatically;
- «Enable Admin State» flag is activation of Admin State mode;
- External network is previously created networks are available for selection;
- «Enable SNAT» flag is activation of SNAT mechanism;
- Possible Availability Zones are possible availability zones.
Follow instructions on the wizard page and enter required parameters. We complete the creation procedure with the button “Create router”. After that, the correctly created router will be displayed in the general list. Otherwise, the system will return you to the wizard window indicating reasons for the impossibility of its creation.
After the successful creation procedure is completed, the router may need some time to finalize all the parameters. Ultimately, the router is displayed with the status “Active”.
Editing router
Function allows to edit name, administrative state and type of the selected router. Available in the general list of all routers. After calling the action in the window that opens, set required parameters:
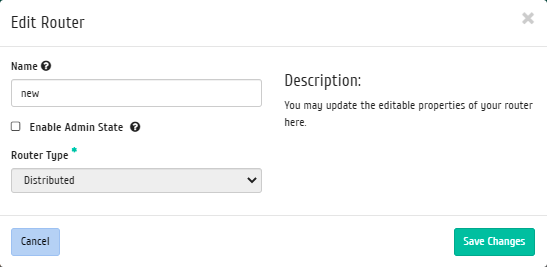
Window for changing parameters of router
End the procedure with confirmation button.
Adding gateway
In the general list of routers using the «Set gateway» function you can connect the router to the external network:
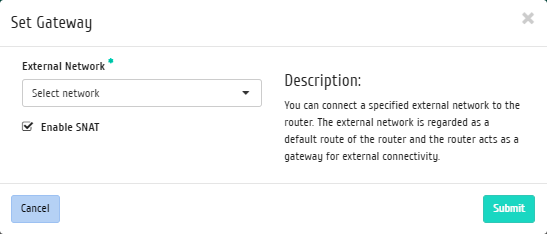
Add gateway window
Selected network will be default gateway to the external connection.
Set the selected gateway with the «Submit» button.
Disabling gateway
Disconnecting the gateway from router. Action is available in the general list using «Clear gateway» function:

Disable gateway window
Confirm disconnection with «Clear gateway» button.
Adding interface
Function is available in the inner tab «Interfaces».
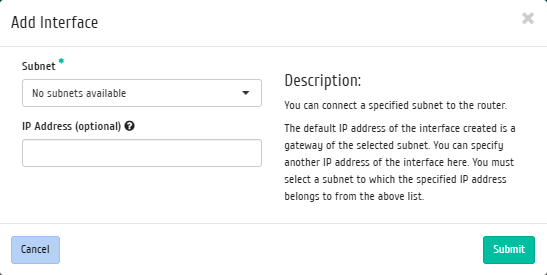
Adding interface window
In the window that opens, indicate:
- Subnet is one of previously created subnets available for selection;
- IP address of interface.
Follow instructions on pages of the wizard and enter the required parameters. Complete creation procedure with the «Submit» button. After that, the correctly created interface will be displayed in the general list. Otherwise, the system will return you to the wizard window indicating reasons for impossibility of its creation.
Adding static route
Function is available in the inner tab «Static routes».
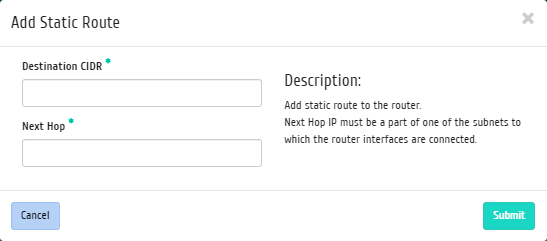
Adding static route window
In the window that opens, indicate:
- Destination CIDR is destination IP address;
- Next hop is the next hop. It contains IP address of the router to destination.
Confirm the entered data with «Submit» button.