Client custom settings
Basic custom settings
When working RSclient without using smart card main window of client open after application launching:
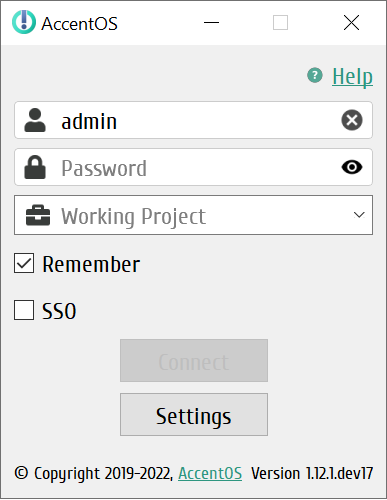
RSclient main window
Use the «Settings» button in the main application window to make basic user settings for connection parameters.
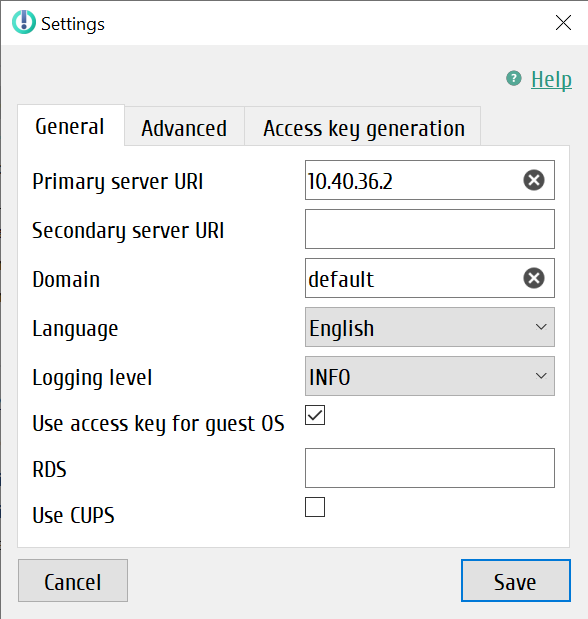
Settings
It is need specify server(s) data in the window that opens and save them.
Note
The item «Help» is a link to technical support email.
Description of connection parameters
| Parameter | Description |
|---|---|
| Username | User account name. It is required to fill out. |
| Password | User account password. It is required to fill out. |
| Project | TRS project name. It is optional field. If it is empty, the connection to the server is made to one of TRS projects available to the user. |
| Primary server address | Main server address or hostname to connect to, for example, ana-deb9q-ovs-01.stand.loc or 10.35.21.23. It is required to fill. If HTTPS is used, the server address must be specified in the format https: // <host name>: <HTTPS port>, for example, https: //ana-deb9q-ovs-01.stand.loc: 8889. |
| Secondary server address | Alternate server address or hostname to connect, for example, ana-deb9q-ovs-01.stand.loc or 10.35.21.23. It is optional field. If HTTPS is used, the server address must be specified in the format https: // <host name>: <HTTPS port>, for example, https: //ana-deb9q-ovs-01.stand.loc: 8889. |
| Domain | Domain name. It is optional field. If it is empty, the connection is made to domain default. |
| Language | Application interface language. Available languages:
|
| Log level | Client log level. Available values:
Detailed description of the parameters is available in the section Logging levels. |
| RDS | Overridden address for connection. |
| Use CUPS | Connection to the guest instance is made using an additional argument --use-cups`. |
Select the “Use key for guest OS” checkbox to use data other than the OpenStack user credentials in the “Settings” for authorization in the received instance. Enter the required credentials in the appropriate fields in the “Access Key Generation” tab that appears. Click on the “Generate access key” button for subsequent automatic use of the entered data, click the “Save” button and execute the request for instance for one-time use.
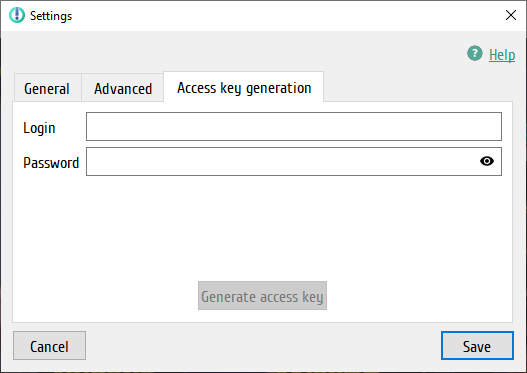
“Access Key Generation” tab