How to automatically add instance to domain?
To add instance to domain, you need to install the cloud-init module in the guest operating system. More information about the plugin for Windows-based systems can be found at the link.
It should be remembered that in addition to the locally hosted script, the cloud-init module will execute the instructions specified in the “Configuration Script” parameter in the “Configuration” submenu of the TRS project creation form.
More details about this setting option can be found in the corresponding Dashboard instructions section.
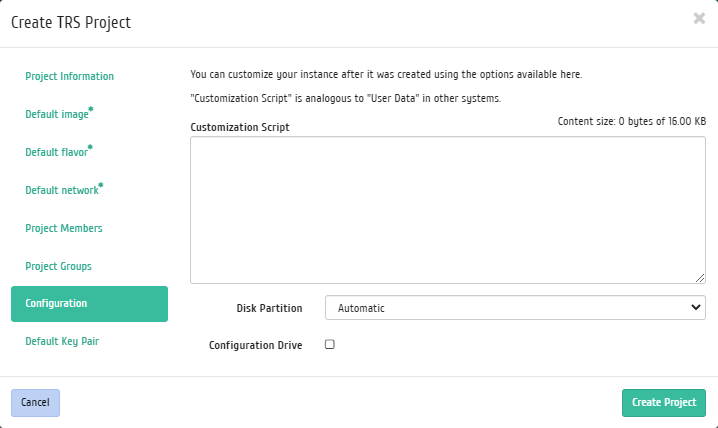
“Configuration” tab of the TRS project creation form
Using PowerShell
Important
You must use the start tag <powershell> and the corresponding end tag </powershell> in your PowerShell script.
Set the domain to add:
$DomainToJoin = "accentos.loc"
Specify the description of the OU specification in which the server account should be created:
$OU = "OU=TestOU,DC=accentos,DC=loc"
To transfer a user with rights to introduce objects to the domain, run the command:
$user = "Administrator"
To send the password, run the command:
$password = "TestPass"
$secure_password = ConvertTo-SecureString -String $password -AsPlainText -Force
Generate an access token:
$credential = New-Object System.Management.Automation.PSCredential($user, $secure_password)
Add to domain:
Add-Computer -DomainName $DomainToJoin -OUPath $OU -Credential $credential -Restart
Unattend Files does not require a client, uses SysPrep tools, but can be included in the XML configuration file for cloud-init.
Unattend Files example (unsafe addition):
-----------------------------------------------------------------------------------------
<?xml version="1.0" encoding="utf-8"?>
<unattend xmlns="urn:schemas-microsoft-com:unattend">
    <settings pass="specialize">
        <component name="Microsoft-Windows-UnattendedJoin" processorArchitecture="x86" publicKeyToken="31bf3856ad364e35"
language="neutral" versionScope="nonSxS" xmlns:wcm="https://schemas.microsoft.com/WMIConfig/2002/State"
xmlns:xsi="http://www.w3.org/2001/XMLSchema-instance">
            <Identification>
                <UnsecureJoin>true</UnsecureJoin>
            </Identification>
        </component>
        <component name="Microsoft-Windows-Shell-Setup" processorArchitecture="x86" publicKeyToken="31bf3856ad364e35"
language="neutral" versionScope="nonSxS" xmlns:wcm="https://schemas.microsoft.com/WMIConfig/2002/State"

xmlns:xsi="http://www.w3.org/2001/XMLSchema-instance">
            <ProductKey>XXXX-XXXX-XXXX-XXXX-XXXX</ProductKey>
        </component>
    </settings>
</unattend>
-----------------------------------------------------------------------------------------
Unattend Files example (safe addition):
-----------------------------------------------------------------------------------------
<?xml version="1.0" encoding="utf-8"?>
<unattend xmlns="urn:schemas-microsoft-com:unattend">
    <settings pass="specialize">
        <component name="Microsoft-Windows-UnattendedJoin" processorArchitecture="x86" publicKeyToken="31bf3856ad364e35"
language="neutral" versionScope="nonSxS" xmlns:wcm="https://schemas.microsoft.com/WMIConfig/2002/State"
xmlns:xsi="http://www.w3.org/2001/XMLSchema-instance">
            <Identification>
                <UnsecureJoin>false</UnsecureJoin>
                <Credentials>
                    <Domain>accentos.loc</Domain>
                    <Password>TestPass</Password>
                    <Username>Administrator</Username>
                </Credentials>
            </Identification>
        </component>
        <component name="Microsoft-Windows-Shell-Setup" processorArchitecture="x86" publicKeyToken="31bf3856ad364e35"
language="neutral" versionScope="nonSxS" xmlns:wcm="https://schemas.microsoft.com/WMIConfig/2002/State" xmlns:xsi="http://www.w3.org/2001/XMLSchema-instance">
            <ComputerName>%MACHINENAME%</ComputerName>
        </component>
    </settings>
</unattend>
-----------------------------------------------------------------------------------------
With xml and sysprep
To add a instance to the domain, you need to put 2 files in the right folders and run sysprep.
The response file 2.xml needs to be edited and placed in the folder c:\windows\system32\sysprep\.
It is need to edit the part in which the domain and credentials are indicated:
<Identification>
                <Credentials>
                    <Domain>demo.loc</Domain>
                    <Password>P@ssw0rd</Password>
                    <Username>administrator</Username>
                </Credentials>
                <JoinDomain>demo.loc</JoinDomain>
</Identification>
Where demo.loc is your domain, P@ssw0rd is your password, administrator is your user.
setupcomplete.cmd file should be placed in the c:\windows\setup\scripts\ folder. If the target folder does not exist, then it must be created. The file is needed to remove the answer file after sysprep has completed.
Next, open cmd as administrator and execute the command:
SYSPREP /GENERALIZE /OOBE /SHUTDOWN /UNATTEND:C:\Windows\System32\sysprep\2.xml
The sysprep command may need to navigate to the folder.
This command will cause sysprep to pack Windows and shut it down.
The next time sysprep is enabled, it will deploy Windows according to the answer file and bring it into the domain accordingly.
Example file 2.xml:
<?xml version="1.0" encoding="UTF-8"?>
 -<unattend xmlns="urn:schemas-microsoft-com:unattend">
 -<settings pass="oobeSystem">
 -<component language="neutral" xmlns:xsi="http://www.w3.org/2001/XMLSchema-instance" xmlns:wcm="http://schemas.microsoft.com/WMIConfig/2002/State" versionScope="nonSxS" publicKeyToken="31bf3856ad364e35" processorArchitecture="amd64" name="Microsoft-Windows-Shell-Setup">
 -<OOBE>
    <NetworkLocation>Work</NetworkLocation>
    <HideEULAPage>true</HideEULAPage>
    <ProtectYourPC>1</ProtectYourPC>
    <SkipMachineOOBE>true</SkipMachineOOBE>
    <SkipUserOOBE>true</SkipUserOOBE>
   </OOBE>
     <TimeZone>Russian Standard Time</TimeZone>
     <RegisteredOwner>vdi</RegisteredOwner>
     <RegisteredOrganization>vdi</RegisteredOrganization>
   </component>
  -<component language="neutral" xmlns:xsi="http://www.w3.org/2001/XMLSchema-instance" xmlns:wcm="http://schemas.microsoft.com/WMIConfig/2002/State" versionScope="nonSxS" publicKeyToken="31bf3856ad364e35" processorArchitecture="amd64" name="Microsoft-Windows-International-Core">
    <InputLocale>ru-RU</InputLocale>
    <SystemLocale>ru-RU</SystemLocale>
    <UILanguage>ru-RU</UILanguage>
    <UserLocale>ru-RU</UserLocale>
   </component>
  </settings>
 -<settings pass="specialize">
   -<component language="neutral" xmlns:xsi="http://www.w3.org/2001/XMLSchema-instance" xmlns:wcm="http://schemas.microsoft.com/WMIConfig/2002/State" versionScope="nonSxS" publicKeyToken="31bf3856ad364e35" processorArchitecture="amd64" name="Microsoft-Windows-UnattendedJoin">
   -<Identification>
   -<Credentials>
   <Domain>demo.loc</Domain>
   <Password>P@ssw0rd</Password>
   <Username>administrator</Username>
  </Credentials>
   <JoinDomain>demo.loc</JoinDomain>
   </Identification>
  </component>
  </settings>
 -<settings pass="generalize">
   -<component language="neutral" xmlns:xsi="http://www.w3.org/2001/XMLSchema-instance" xmlns:wcm="http://schemas.microsoft.com/WMIConfig/2002/State" versionScope="nonSxS" publicKeyToken="31bf3856ad364e35" processorArchitecture="amd64" name="Microsoft-Windows-PnpSysprep">
    <PersistAllDeviceInstalls>true</PersistAllDeviceInstalls>
   </component>
 </settings>
 <cpi:offlineImage xmlns:cpi="urn:schemas-microsoft-com:cpi" cpi:source="catalog:e:/sources/install_windows 7 professional.clg"/>
</unattend>
Example file SetupComplete.cmd:
del /Q /F c:\windows\system32\sysprep\2.xml
del /Q /F c:\windows\panther\2.xml
Important
In order to use the last three methods of adding to a domain using cloudbase-init, you need to enclose the commands in a <script></script> tag or prepend rem cmd.
Using the netdom utility
In order to be able to run the utility on Windows 10, you need to install the RSAT utility package. To add to the domain, run the command:
netdom.exe join %computername% /domain:DomainName /UserD:DomainName\UserName /PasswordD:Password
Using WMI
Note
It is recommended not to use Cyrillic names with this utility.
To add a Windows instance using WMI, run the command:
wmic computersystem where name="%computername%" call joindomainorworkgroup fjoinoptions=3 name="homelab.local" username="homelab\labadmin" Password="secret"
Advanced scenario with input to a specific domain operating group
Extended scenario with input an instance into a specific domain operating group:
<script>
wmic computersystem where name="%computername%" call joindomainorworkgroup fjoinoptions=3 name="homelab.local" username="homelab\labadmin" Password="secret" AccountOU="OU=TS_TEST1;OU=TS_Servers;OU=TS_FARM;OU=Servers-VDI;DC=homelab;DC=local"
gpupdate /force
shutdown /r
</script>
Using the Get-WmiObject PowerShell Cmdlet
Note
To use the PowerShell file, you must do folowing:
Execute on the command line:
powershell -Command Set-ExecutionPolicy RemoteSigned
To add instance using the PowerShell Get-WmiObject cmdlet, run the command:
(Get-WMIObject -NameSpace "Root\Cimv2" -Class "Win32_ComputerSystem").JoinDomainOrWorkgroup("homelab.local","secret","homelab\labadmin",$null,3)
It is also recommended that you read the following information: