Installation and configuration
Installation
Important
First need to do setting up the environment. All commands are executed only from superuser.
Mode superuser:
sudo -i
Important
Installation is performed on the control node. It is need to install the OpenStack Nova API service for the module to work.
Save the list of previously installed packages before starting the installation, this will allow you to painlessly restore the system in case of damage. Run the following commands to do this:
mkdir -p /tmp/rollback/monitor
pip3 freeze > /tmp/rollback/monitor/pip_before.txt
After that, directory
/tmp/rollback/monitorwill contain filepip_before.txtwith list of installed applications.Also save migration versions:
openstack aos db list -n monitor > /tmp/rollback/monitor/migrations.txt
Where:
/tmp/rollback/monitor/is file directory;migrations.txtis name of file with migration versions.
Install the package Monitor:
pip3 install monitor
Save the list of installed packages after installation to be able to roll back changes:
pip3 freeze > /tmp/rollback/monitor/pip_after.txt
Note
To install Monitor on Astra Linux (Smolensk) do following:
Connect the provided repository with AccentOS packages.
Install the package with the command:
sudo apt install -y aos-monitor
Installation on two or more controllers
It is necessary to install the module with the same parameters on each of controllers when installing Monitor on two or more controllers.
Note
Deleting and diagnosing a module on each controller is done in the same way as for one controller.
Configuration
Perform initial configuration of the module:
openstack aos configure -n monitor
Create directory for logs with the required permissions:
mkdir -p /var/log/aos/monitor
chown -R aos:aos /var/log/aos/monitor
Copy sample configuration file, if using non-standard parameters, edit them (for details, see Configuration file):
cp /etc/aos/monitor.conf.example /etc/aos/monitor.conf
Create database using MySQL as an example, set rights, database type and other parameters:
# Login to the database using the root password
mysql -uroot -p
# Create monitor database
CREATE DATABASE monitor;
# Give permission to read, edit, perform any actions on all tables in monitor database
GRANT ALL PRIVILEGES ON monitor.* TO 'aos'@'localhost' IDENTIFIED BY 'password';
GRANT ALL PRIVILEGES ON monitor.* TO 'aos'@'%' IDENTIFIED BY 'password';
# Exit the database
Edit section
[database]of the configuration fileetc/aos/monitor.conf, for example:[database] url = mysql+pymysql://aos:password@tst.stand.loc:3306/monitor?charset=utf8
Migrate database:
openstack aos db migrate -n monitor
Add user to RabbitMQ:
rabbitmqctl add_user aos password
rabbitmqctl add_vhost aos
rabbitmqctl set_permissions -p aos aos ".*" ".*" ".*"
rabbitmqctl set_permissions aos ".*" ".*" ".*"
Create user in OpenStack for API services:
openstack user create --domain default --project service --project-domain default --password password --or-show aos
Assign user service role:
openstack role add --user aos --user-domain default --project service --project-domain default service
Enable and start systemd services:
systemctl daemon-reload
systemctl enable aos-monitor-api.service
systemctl start aos-monitor-api.service
systemctl enable aos-monitor-listener.service
systemctl start aos-monitor-listener.service
Create Monitor API service:
openstack service create --name monitor --description "Monitor Service" monitor
Create endpoints:
openstack endpoint create --region RegionOne monitor internal http://controller:9363
openstack endpoint create --region RegionOne monitor admin http://controller:9363
openstack endpoint create --region RegionOne monitor public http://controller:9363
Zabbix configuration
Monitoring system Zabbix configuration to work with Monitor module.
Note
This section describes the process of creating an FTP service availability check.
Authorization
Go to Zabbix web application address and log in to the service using your credentials:
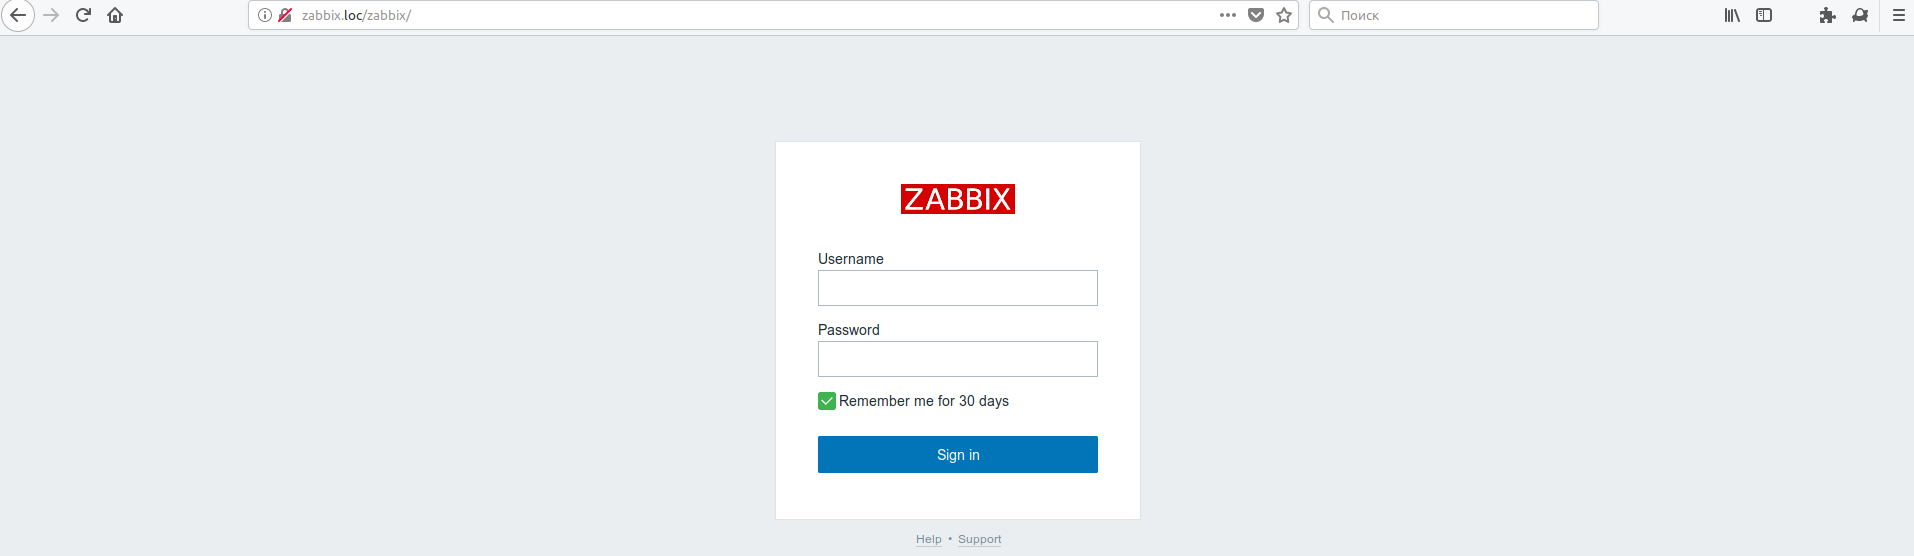
Login window
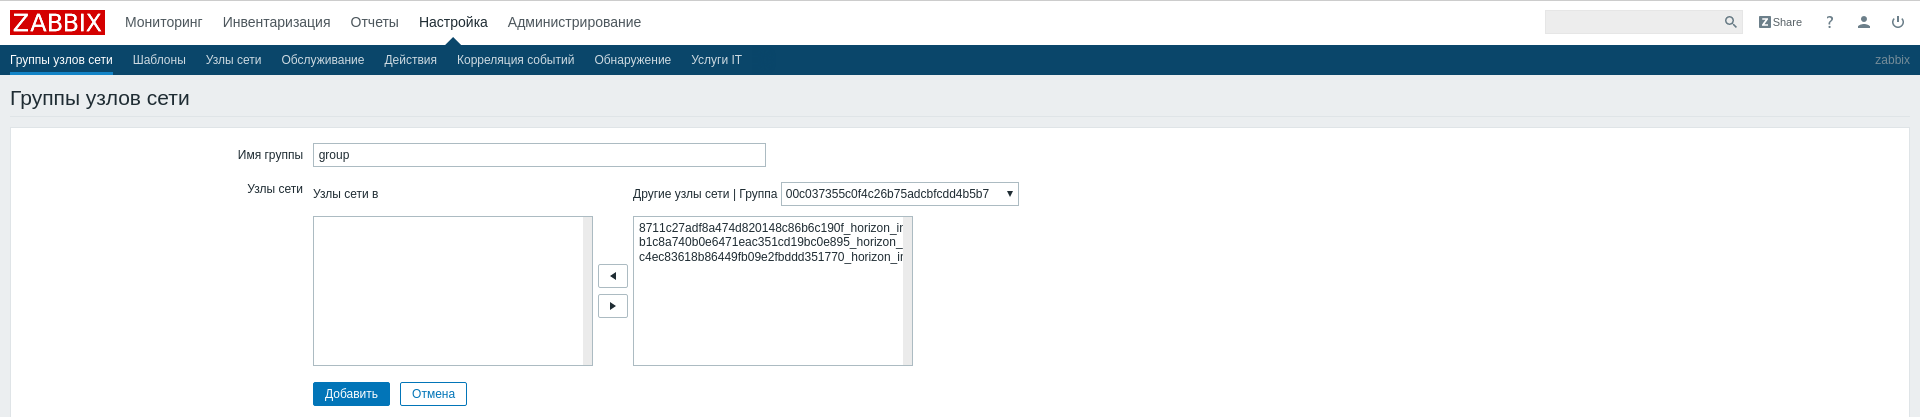
Creating monitoring template
Go to the “Settings”/”Templates” menu and click the “Create template” button:
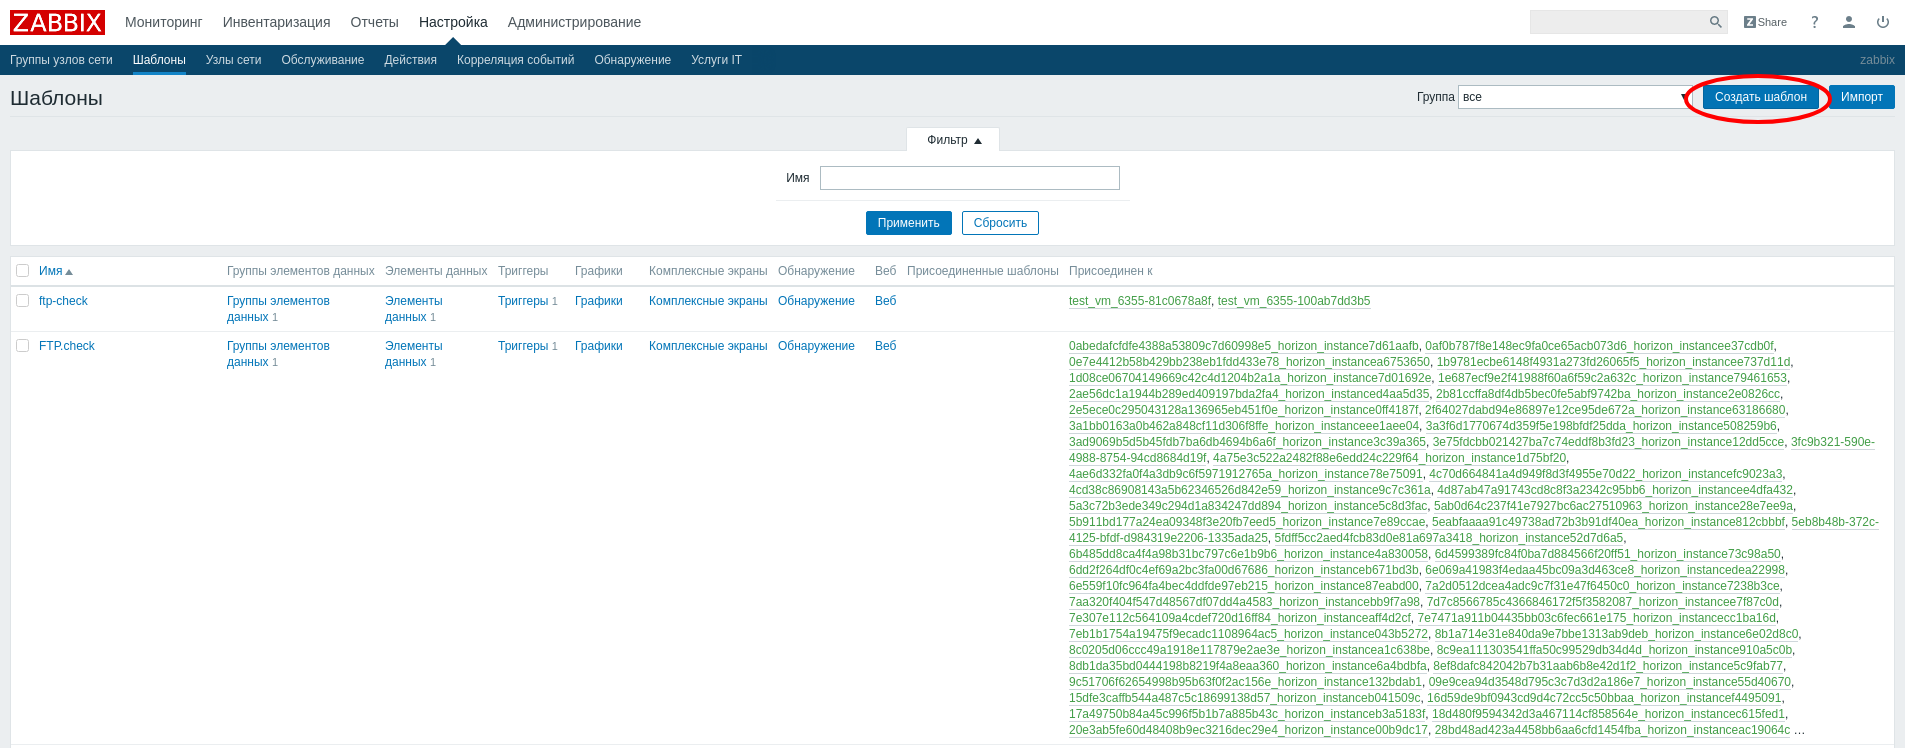
List of monitoring templates
On the page that opens, set the template name and hosts group:
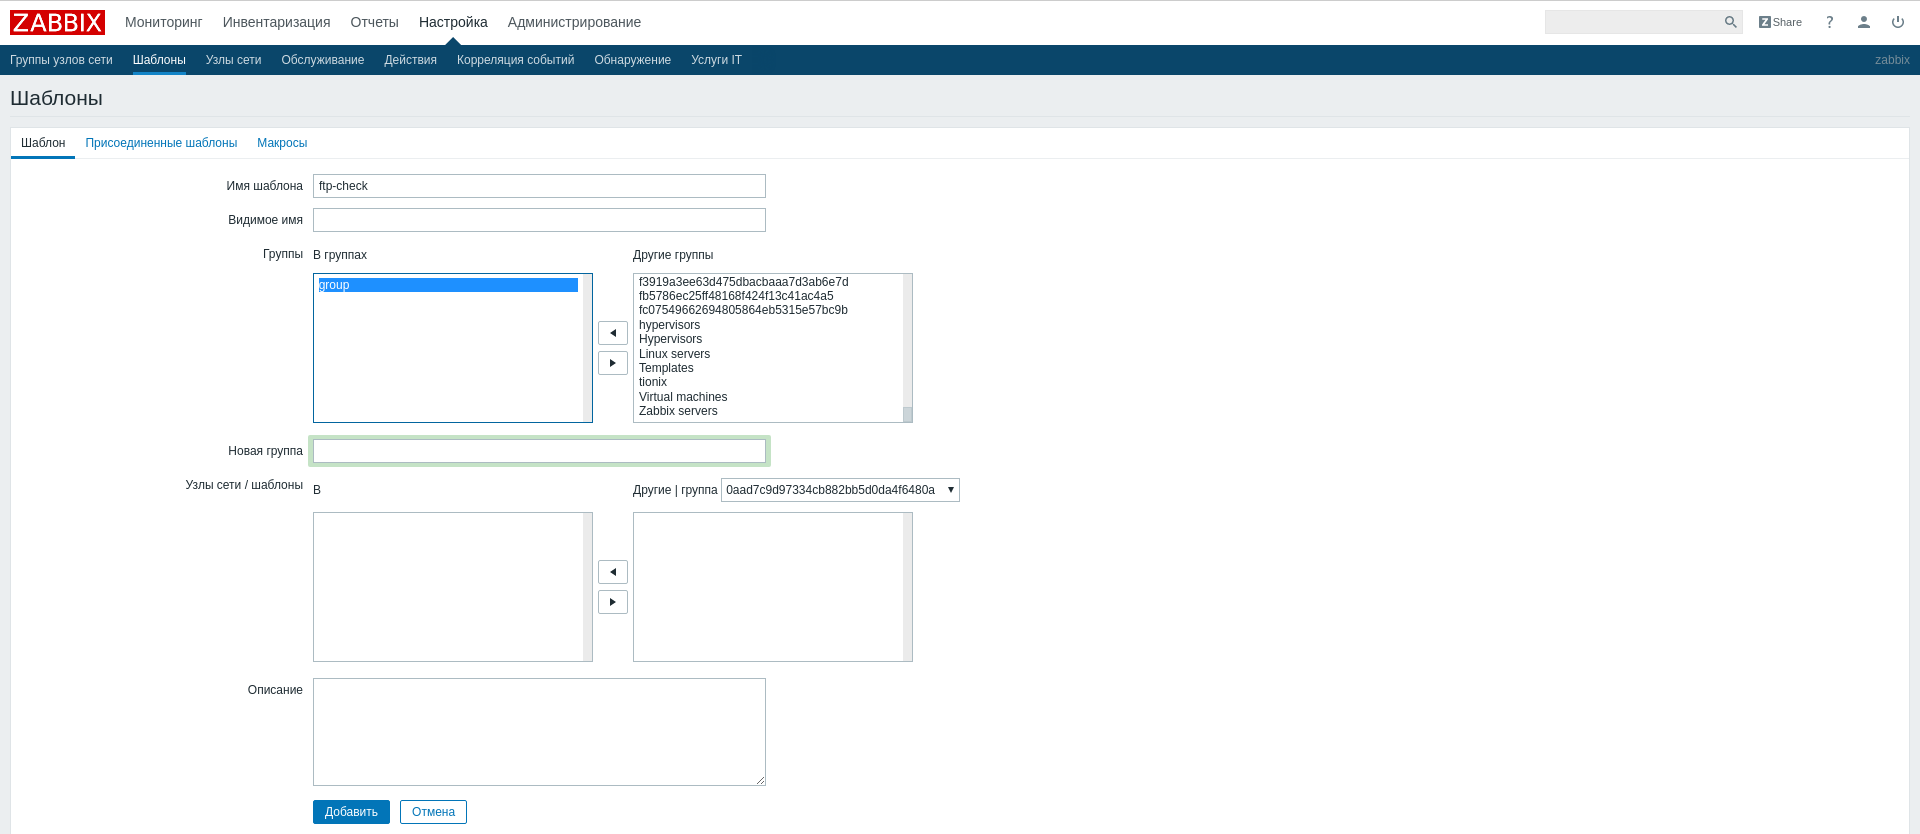
Template creation form
In our case, the template name is
ftp-check, since we want to check the availability of the FTP service. Specify the previously createdaos_groupas the hosts group. The fields “Visible name”, “Hosts/templates” and “Description” are optional.It is need to add to the template: groups of data items (Applications) and data items (Items) after creation. These parameters will track the template and triggers that will react to changes in this data and fire at the given values.
Creating a group of data items
Go to the menu “Settings”/”Templates”, find the created template
ftp-checkin the list and click on “Data Elements Groups”: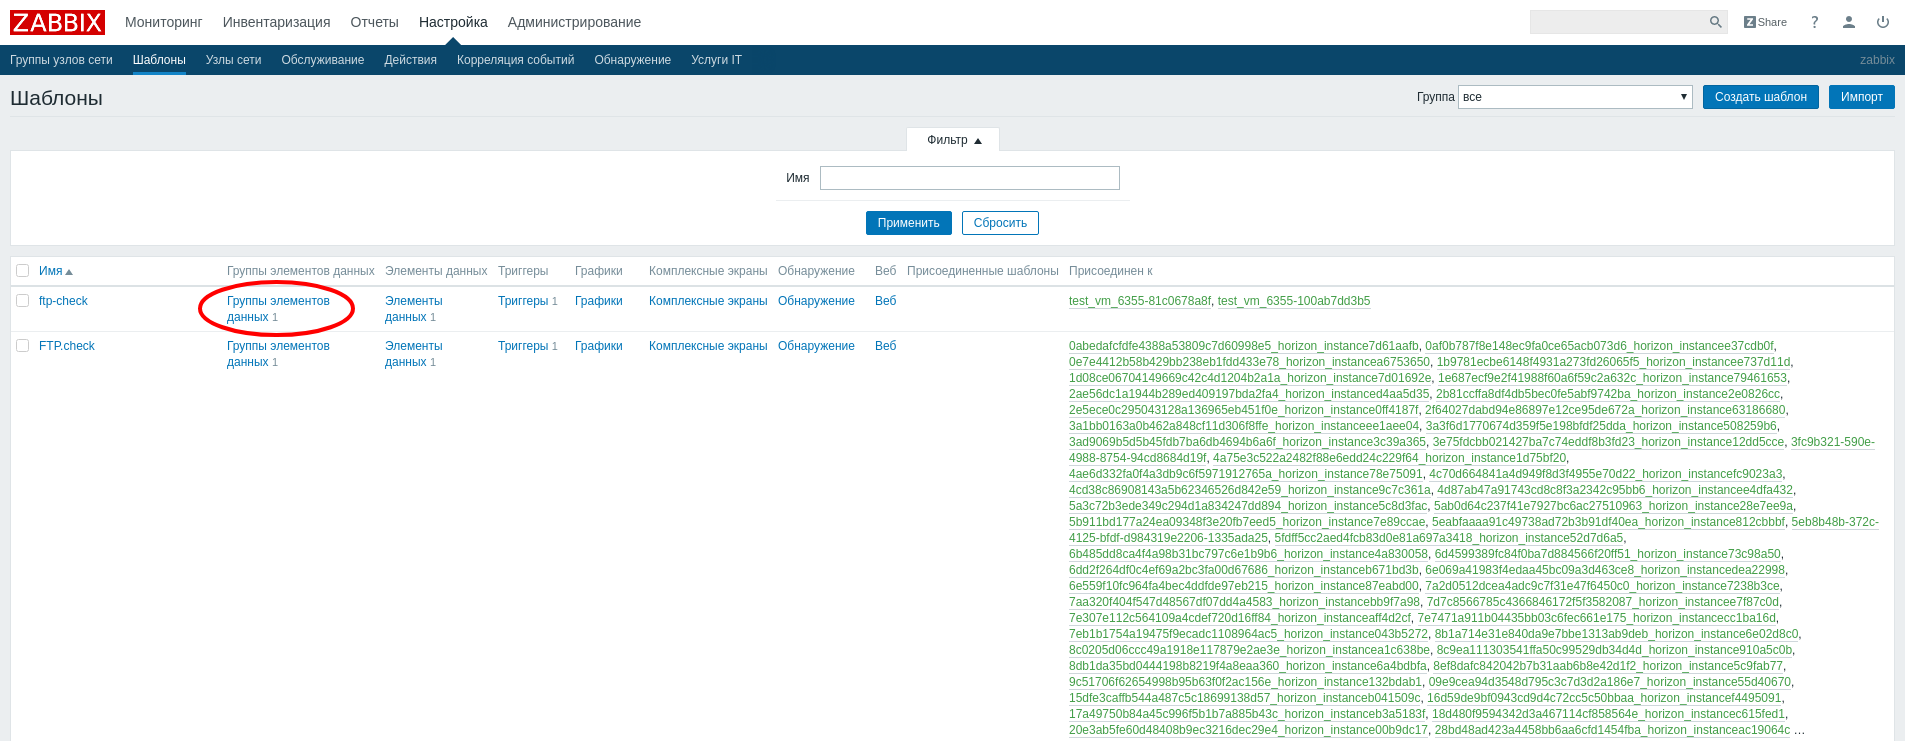
List of templates
In the window that opens, click “Create data items group”:

List of data items groups
Enter name in creation form:

Form for creating items group
Add elements group with the “Add” button.
Creating data element
Go to the menu “Settings”/”Templates”, find the template “ftp-check” in the list and click on “Data items”:
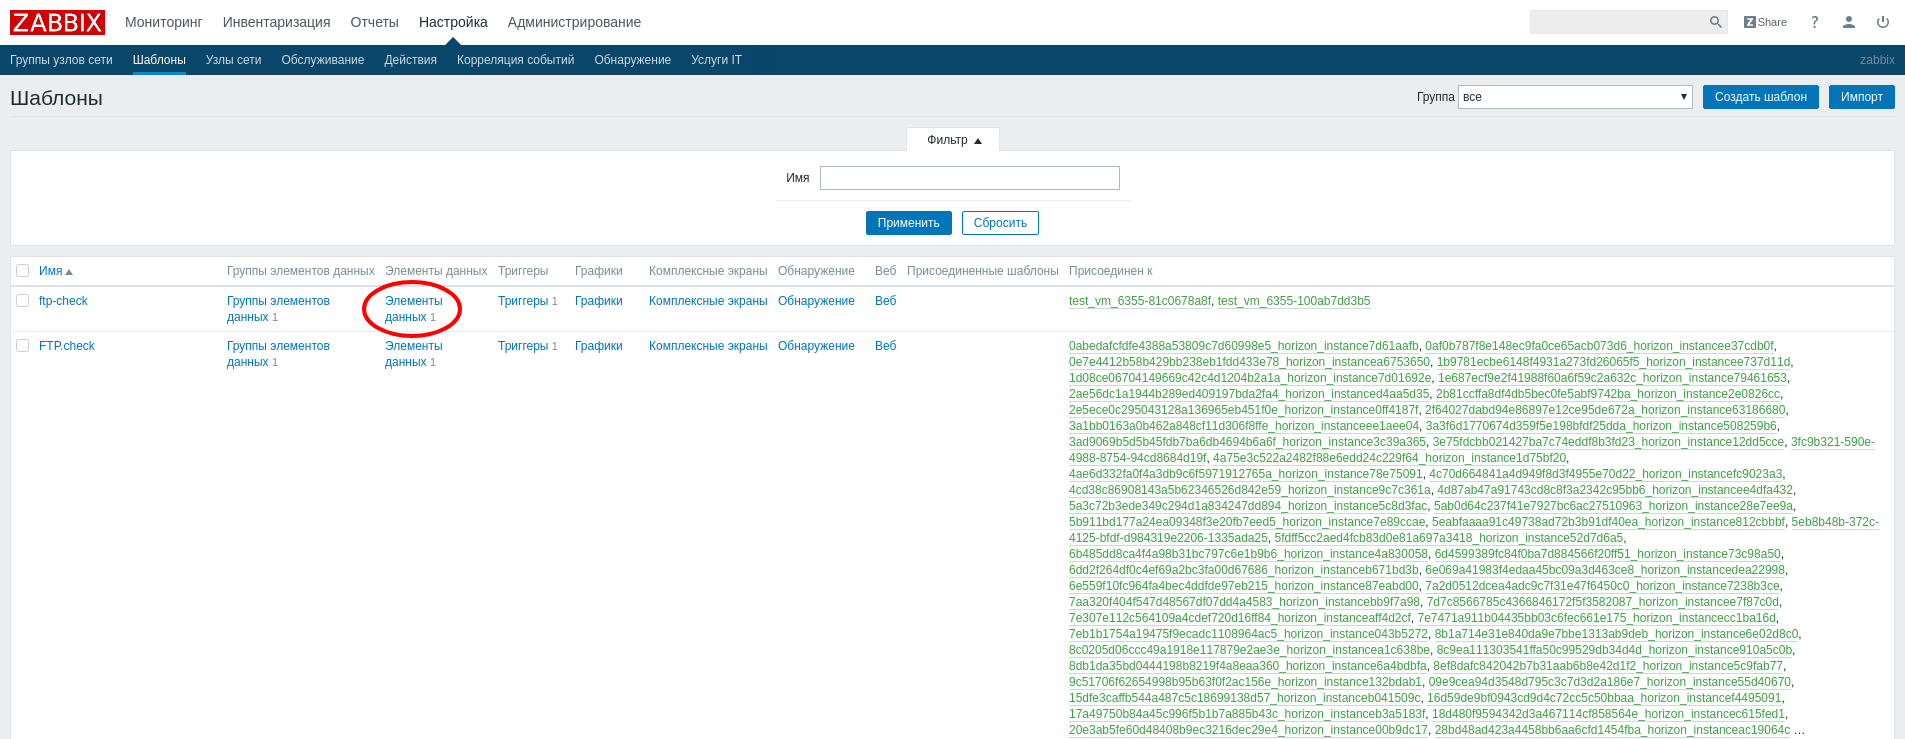
List of templates
In the window that opens, click “Create data item”:
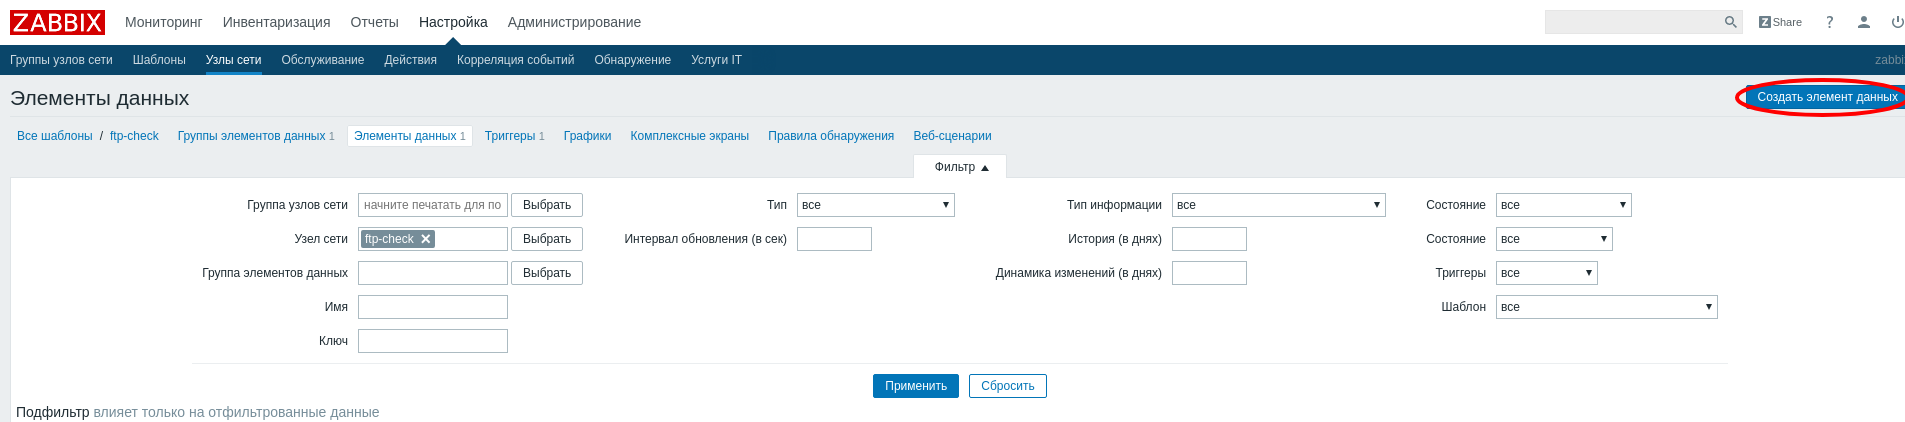
List of template data items
Fill in the required fields on the data item creation page:
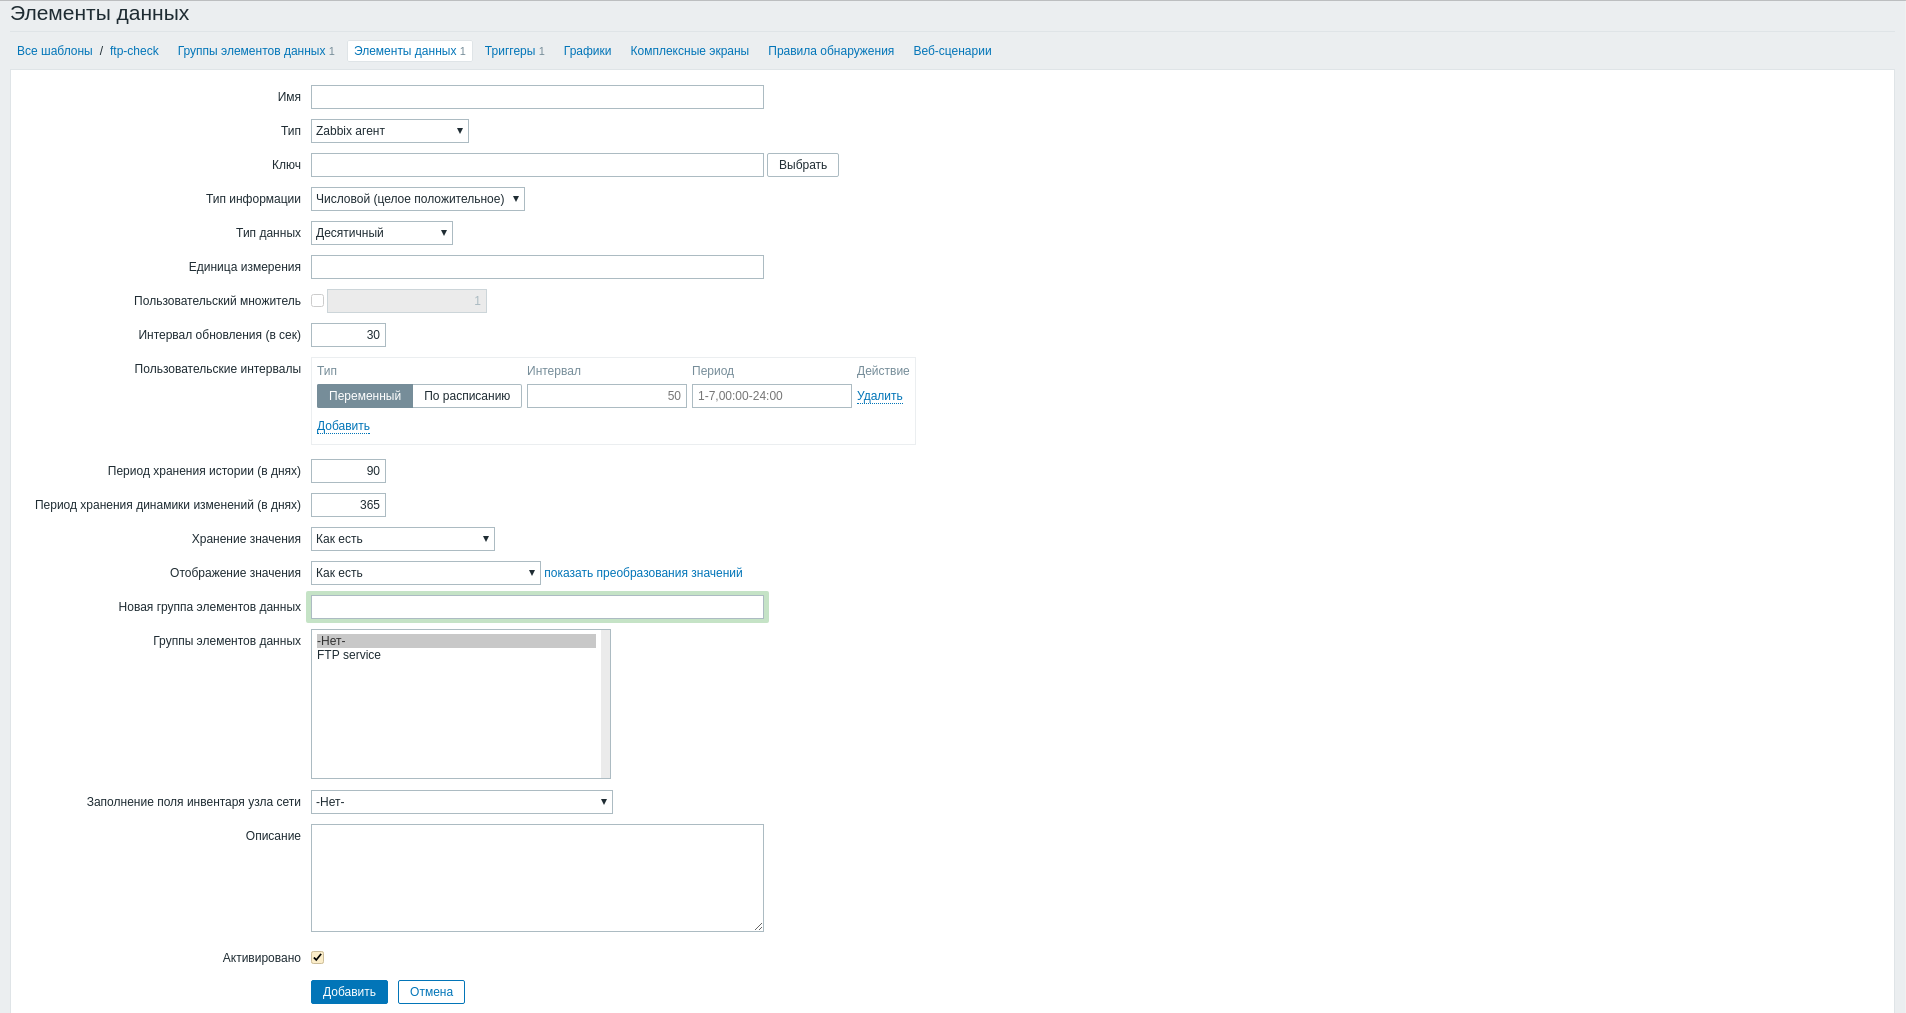
Item creation form
- Name is
FTP.test; - Type is
simple check; - Key is
net.tcp.service[ftp].
Note
Field “Key” can be filled not manually, but choose the appropriate option from the standard data elements, in our case,
net.tcp.service [service, <ip>, <port>], which allows to check any TCP services.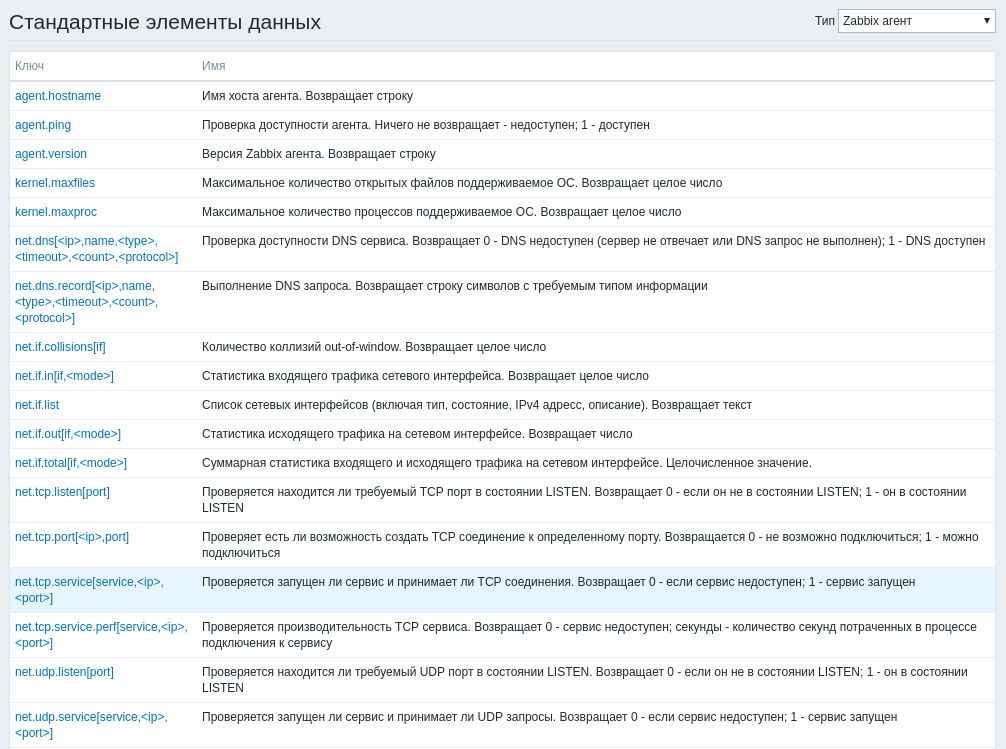
List of standard data items
- Update interval (in sec) is 60;
- History storage period (in days) is 7;
- Display value is Service state;
- Item groups is Ftp service.
Complete the procedure for creating data item
FTP.testwith button “Add”.- Name is
FTP.test will perform simple check of the FTP service on a remote host after creation, that is, without using a Zabbix client, with an interval of 60 seconds. Also, the created item was added to the FTP service data items group (Applications), which was created earlier.
Trigger creation
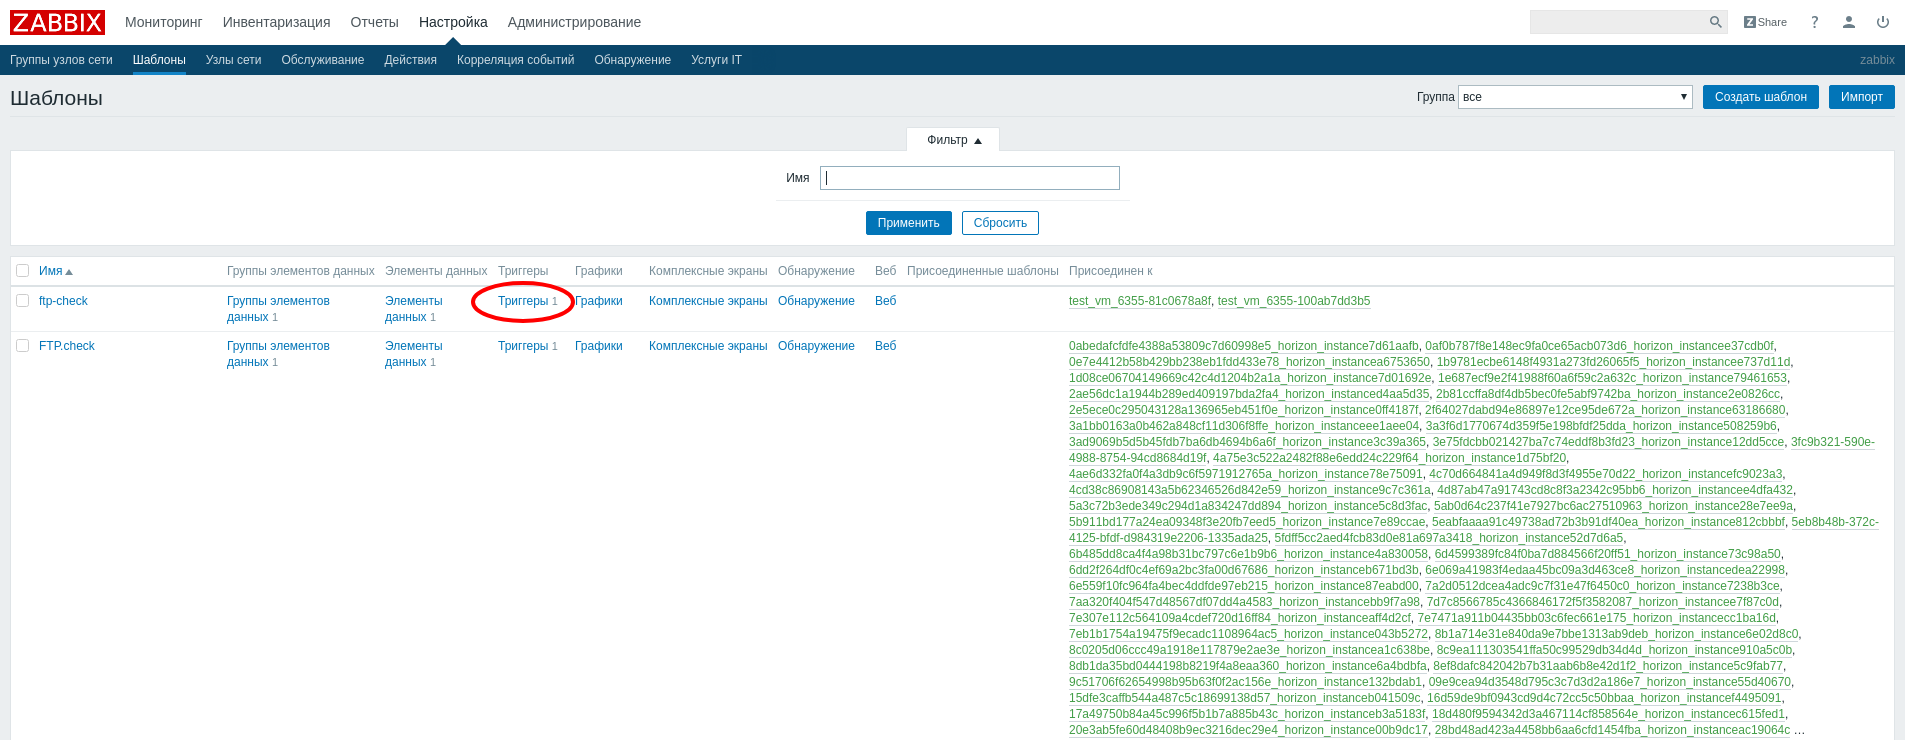
Go to the menu “Settings”/”Templates”, find the template
ftp-checkin the list and click on “Triggers”: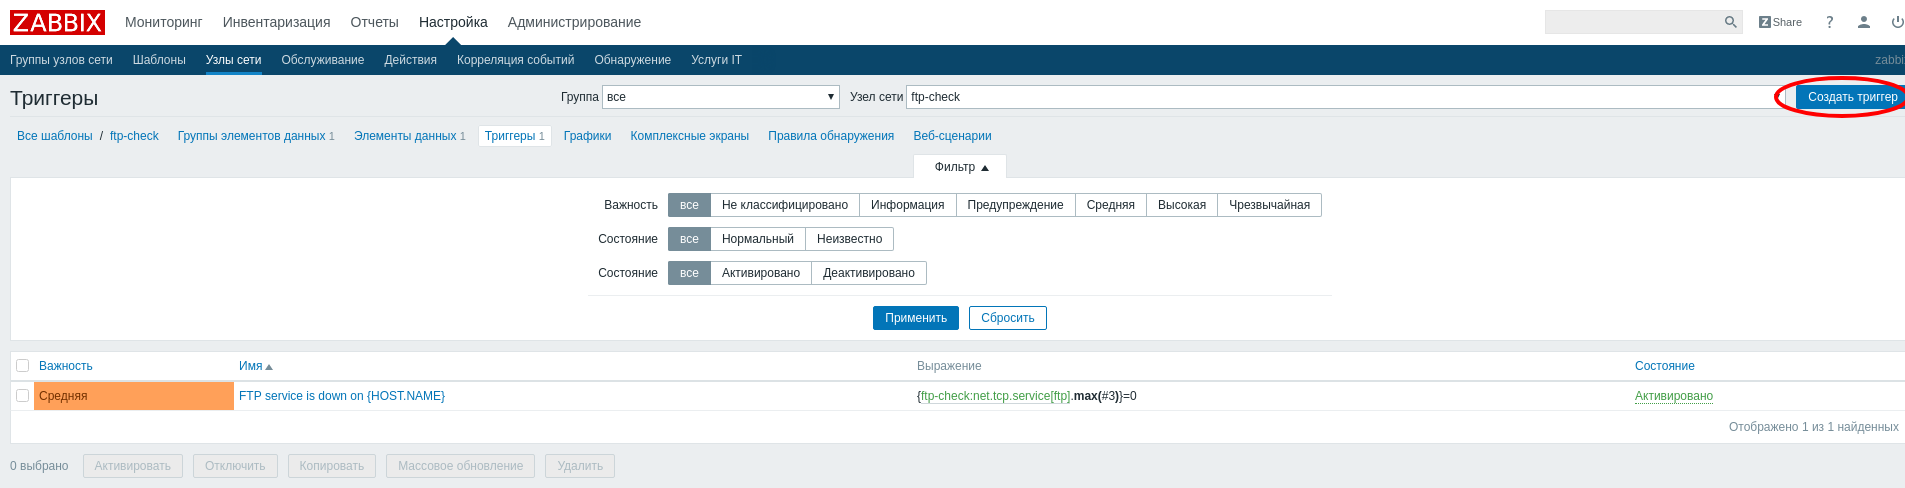
List of templates
In the window that opens, click “Create trigger”:
List of template triggers
On the trigger creation page, fill in the required fields:
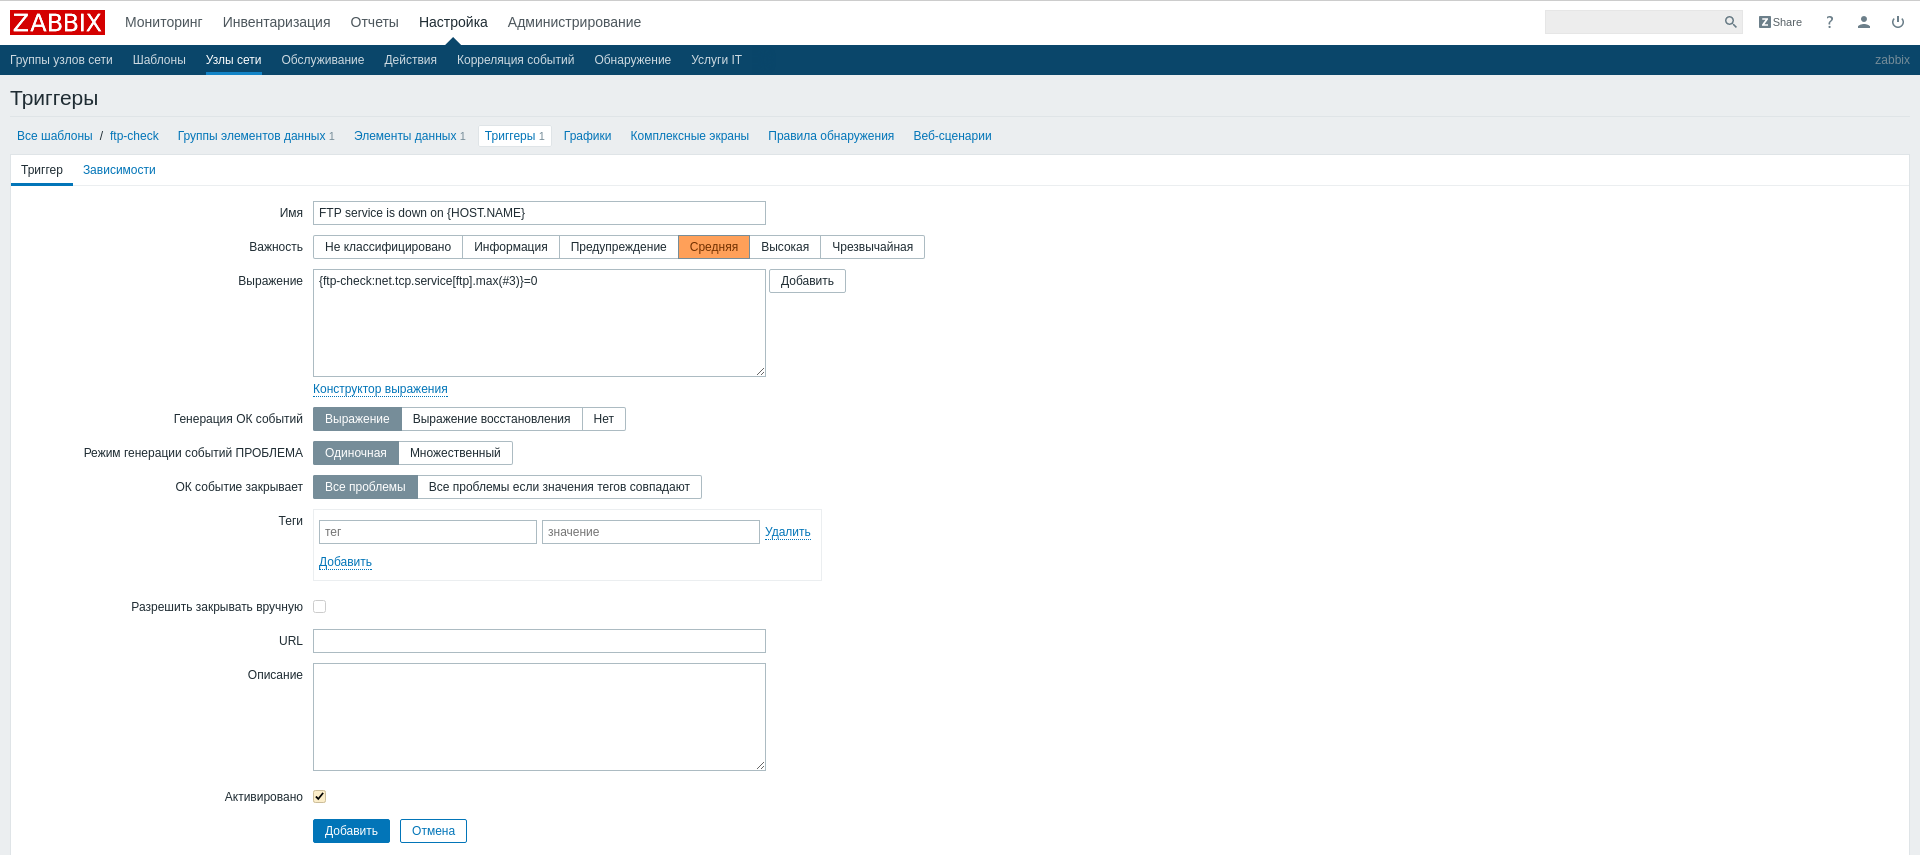
Trigger creation form
- Name is
FTP service is down on {HOST.NAME}; - Importance is
Medium; - Expression is
{ftp-check:net.tcp.service[ftp].max(#3)}=0.
Complete procedure for creating the trigger
FTP service is down on {HOST.NAME}by clicking the “Add” button.- Name is
After creation, the trigger will be triggered if no response has been received from it for the last three polls of the FTP service.
This completes the procedure for creating and configuring a template for checking the availability of an FTP service. By the same analogy, you can easily configure templates for SSH and HTTP services.
Additionally
For the monitoring system to work correctly, it is necessary to configure the configuration file of Monitor module
/etc/aos/monitor.conf. Example:[zabbix] url = http://localhost/zabbix username = Admin password = zabbix host_group = aos
Where:
You can check the operation of the monitoring system in Dashboard graphical interface. To do this, on the “Identification” - “Projects” tab for the required project configure the integration with Zabbix monitoring system. The credentials of Zabbix user created to integrate the project will be needed to log in to Zabbix monitoring system and view monitoring data.
Next on «Administration» - «Integration» - «Monitoring» tab select the required instance in the project for which integration with Zabbix is configured, use the function «Templates Management» and assign the necessary monitoring templates for the instance.
Log in to Zabbix using the user credentials created during the monitoring configuration step for the project to view the monitoring data of instances.
Configuration file
Note
Config file allows to override sections and parameters of common file aos.conf for specific module.
Note
There are no lines with the level logging by default in the file cloud_manager.conf.example, it is specified if necessary. Level logging is set by default in the general configuration file. More information about the configuration files can be found in the corresponding section.
Configuration file is presented in ini format and consists of the following sections and parameters:
| Section | Parameter | Description | Default value |
|---|---|---|---|
| DEFAULT | ceilometer_meters | List of metrics that are displayed when requesting performance statistics instances. | memory.usage, cpu, network.in coming.bytes, n etwork.outgoing .bytes, network .incoming.packe ts, network.out going.packets |
| DEFAULT | enable_backup | Parameter to enable or disable the functionality of working with Bareos service. | False |
| DEFAULT | enable_ceilometer_monitoring | Parameter to enable or disable the functionality of working with Ceilometer service. | True |
| DEFAULT | enable_zabbix_monitoring | Parameter to enable or disable the functionality of working with Zabbix service | True |
| api | host | IP address where Monitor API service will run. | 0.0.0.0 |
| api | logfile | Path to log file of aos-monitor-api service . | |
| api | port | Port where Monitor API service will run. | 9363 |
| database | url | Setting up connection to database. | mysql+pymysql:/ /aos:password@l ocalhost:3306/m onitor?charset= utf8 |
| listener | logfile | Path to log file of aos-monitor-listener service. | |
| listener | nova_rabbit_vhost | Nova RabbitMQ service virtual host. | / |
| zabbix | host_group | Name of host group that will be searched by default for templates in Zabbix service. | aos |
| zabbix | password | User password with administrator rights in Zabbix service. | zabbix |
| zabbix | url | Path to Zabbix service. | http://localhos t/zabbix |
| zabbix | username | Username with administrator rights in Zabbix service. | Admin |
Configuration file example
[DEFAULT]
enable_ceilometer_monitoring = true
enable_zabbix_monitoring = true
enable_backup = false
ceilometer_meters =
memory.usage,
cpu_util,
disk.write.requests.rate,
disk.write.bytes.rate,
disk.read.requests.rate,
disk.read.bytes.rate,
disk.latency,
disk.iops,
network.incoming.bytes.rate,
network.outgoing.bytes.rate,
network.incoming.packets.rate,
network.outgoing.packets.rate
[api]
port = 9363
logfile = /var/log/aos/monitor/monitor-api.log
[database]
url = mysql+pymysql://aos:password@localhost:3306/monitor
[listener]
logfile = /var/log/aos/monitor/listener.log
[nova_listener]
logfile = /var/log/aos/monitor/nova-listener.log
nova_rabbit_vhost = /
[zabbix]
url = http://localhost/zabbix
username = Admin
password = zabbix
host_group = aos
Important
It is need to perform the procedure described in the section Updating the configuration file” when changing the parameters of the configuration file for them to take effect.
Recovery plan
Roll back if Monitor fails to install or update:
Compare the versions of the migrations in the file
/tmp/rollback/monitor/migrations.txtwith the current ones. If there are differences migrate to the previous version. Migration example:openstack aos db list -n monitor openstack aos db migrate -n monitor --migration 14
Revert to the previous state of the packages:
cd /tmp/rollback/monitor
diff --changed-group-format='%>' --unchanged-group-format='' pip_before.txt pip_after.txt > pip_uninstall.txt
diff --changed-group-format='%<' --unchanged-group-format='' pip_before.txt pip_after.txt > pip_install.txt
pip3 uninstall -r pip_uninstall.txt
pip3 install -r pip_install.txt